Waar bent u naar op zoek?
Naarmate de acceptatie van zonne-energie groeit, krijgen huiseigenaren met pannendaken zijn steeds meer aan het verkennen veilige installatie van zonnepanelen methoden. Een goede montage zorgt ervoor langdurige dakintegriteit, gemaximaliseerde energieproductie, En lekvrije prestatiesDeze handleiding behandelt de beste werkwijzen voor het bevestigen zonnepanelen op dakpannen veilig en efficiënt.
Energiebesparing: Verlaag uw elektriciteitsrekening met hernieuwbare energie.
Milieuvriendelijk: Verklein uw CO2-voetafdruk.
Verhoogde woningwaarde: Zonne-installaties maken onroerend goed aantrekkelijker.
Voor de installatie:
Controleer op beschadigde of losse tegels – Repareer of vervang ze.
Ruim puin op – Zorg voor een schone en stabiele ondergrond.
Beoordeel de structurele sterkte – Controleer of uw dak geschikt is voor zonnepanelen.
Professionele tip: Huur een professionele dakinspecteur als u niet zeker bent over de staat van uw dak.
Drie veelvoorkomende montagemethoden voor zonnepanelenvoor pannendaken:
Railgebaseerde systemen
De panelen worden bevestigd aan aluminium rails die met dakbeugels vastgezet zijn.
Het beste voor instelbare kantelhoeken.
Tegelvervangingsbevestigingen
Speciale beugels vervangen bestaande tegels.
Minimaliseert dakpenetratie.
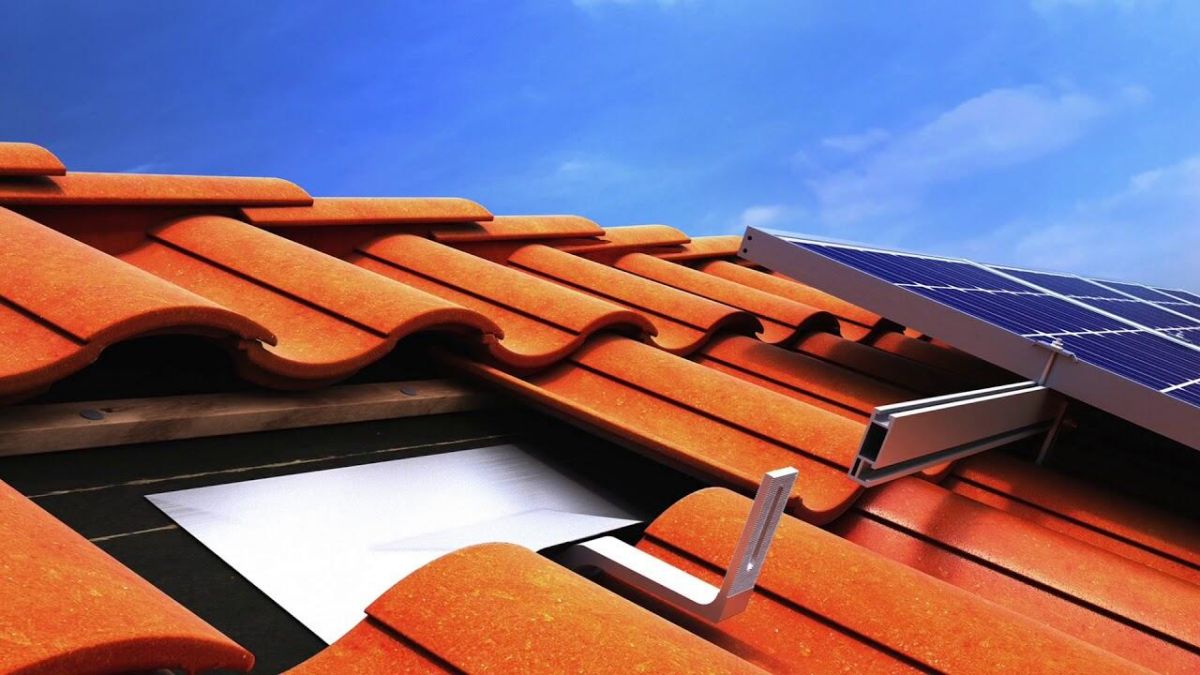
Haakgebaseerde bevestigingen
Haken schuiven onder tegels zonder dat ze verwijderd hoeven te worden.
Ideaal voor minimale verstoring van het dak.
Aanbeveling: Raadpleeg een zonne-installateur om het beste systeem voor uw daktype te selecteren.
Voor spoorwegsystemen:Bevestig de beugels aan de spanten en bevestig vervolgens de rails.
Voor tegelhaken: Til de tegels op, plaats de haken en plaats de tegels opnieuw.
Voor vervangende steunen: Vervang de tegels door montagebeugels.
Belangrijke tip: Gebruik roestvrijstalen bevestigingsmiddelen om roest te voorkomen en duurzaamheid te garanderen.
Toepassen dakbedekking rond de beugels om lekkages te voorkomen.
Zegel met hoogwaardige dakafdichting (bijvoorbeeld siliconen- of butyltape).
Kritisch: Onjuiste afdichting kan leiden tot waterschade—controleer alle zegels nogmaals.
Plaats de panelen op de rails/beugels.
Gebruikklemmen of bouten voor zonnepanelen (volg de koppelspecificaties van de fabrikant).
Ervoor zorgen gelijkmatige gewichtsverdeling om dakspanning te vermijden.
Draadpanelen in serie of parallel (gebaseerd op systeemontwerp).
Huur een erkende elektricien voor netaansluiting en omvormerinstallatie.
Veiligheidswaarschuwing: Houd u altijd aan lokale elektrische codes.
Ideale kantelhoek verschilt per locatie (gebruik een zonnehoekcalculator).
Vermijd schaduw van bomen of schoorstenen.
Controleer alle bevestigingen en afdichtingen voor stabiliteit.
Elektrische verbindingen testen voor een goede werking.
Controleer de systeemprestaties na de installatie.
Terwijl Zelf zonnepanelen installeren is het mogelijk om een gecertificeerde zonne-installateur zorgt voor:
Naleving van bouwvoorschriften
Juist waterdichting en structurele integriteit
In aanmerking komen voor zonne-incentives en garanties
Installeren zonnepanelen op pannendaken vereist precisie om lekken te voorkomen en de efficiëntie te maximaliseren. Door deze stappen te volgen – of door te werken met een gekwalificeerde zonnepaneelinstallateur—je kunt genieten schone energiebesparingen al tientallen jaren.
Hulp nodig?Neem contact op met Xiamen TopFence Co.,Ltd expert voor eengratis consult!

 Xiamen TopFence Co.,Ltd.


 No. 77, LingXia South Road, Huli District, Xiamen City, Fujian, China
 Tel: +8613365923720
 E-mail: info@xmtopfence.com
 IPv6 netwerk ondersteund Sitemap
| XML
| Bloggen
| Privacybeleid
IPv6 netwerk ondersteund Sitemap
| XML
| Bloggen
| Privacybeleid